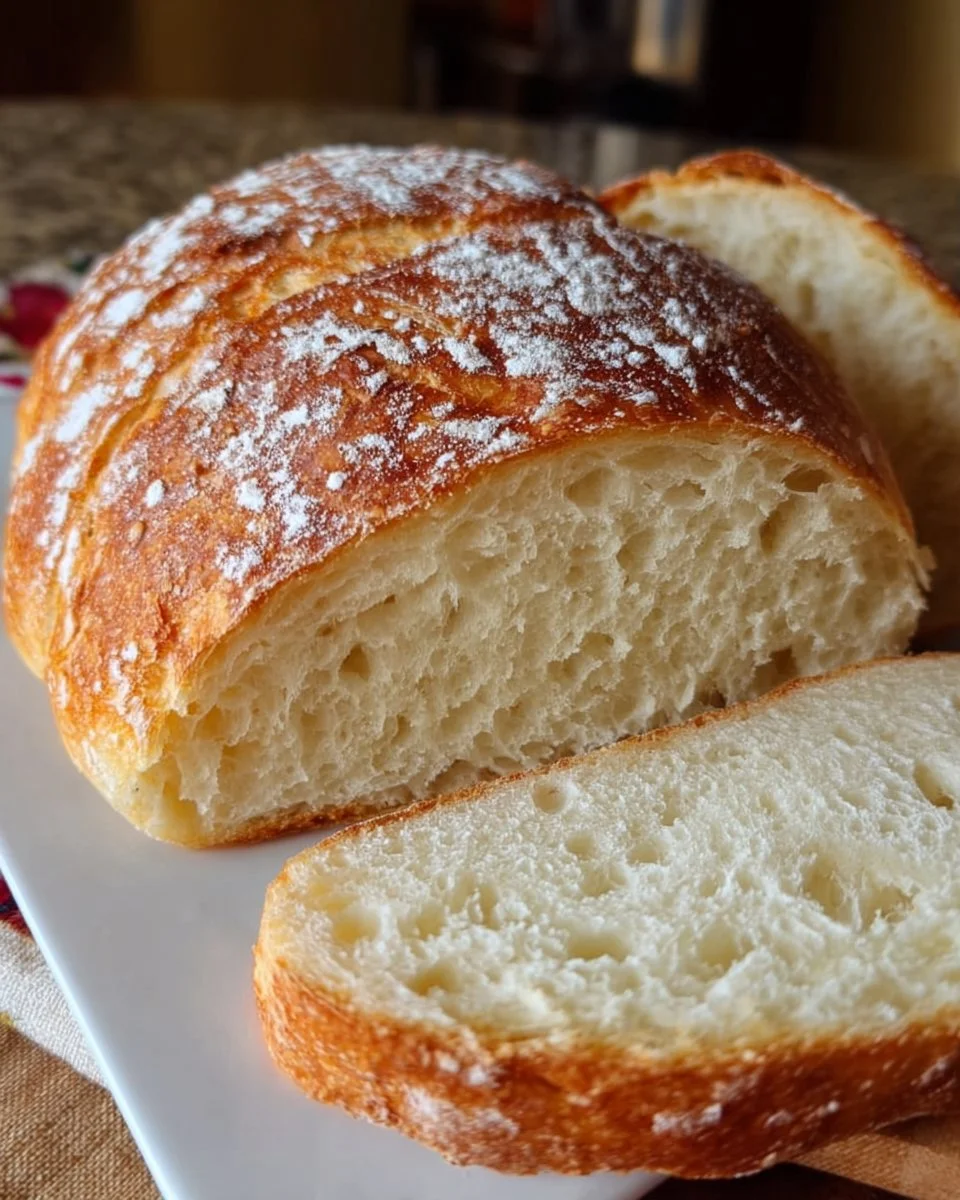
The aroma of freshly baked bread wafts through the air, enveloping you like a warm hug. You walk into the kitchen, and as the golden crust of the loaf cools on the counter, it’s hard to resist the enticing desire to slice into its tender interior. The first cut reveals a soft, pillowy crumb, with tiny air pockets that beckon for a smear of butter. The crunch of the crust resonates softly, its warmth still radiating from the loaf, promising a slice full of flavor. It’s nothing short of pure comfort food.
Homemade no-knead sandwich bread transforms a simple loaf into something extraordinary. You don’t just eat it; you savor it. Each bite offers a delicate balance between the crusty exterior and the airy inside, a dance of textures that finally culminates in the satisfying chew that bread lovers adore. It’s the kind of bread that not only elevates your sandwiches but also encourages you to relish a simple slice with nothing but an elegant drizzle of olive oil.
Why You’ll Love This Homemade No-Knead Sandwich Bread
This no-knead sandwich bread stands out for its incredible ease of preparation and the rich rewards that come from such minimal effort. You simply mix, let it rest, and bake, yielding a gorgeous loaf that you might think came from a bakery down the street. Its flavor profile leans on the rustic side, slightly tangy due to the fermentation process, and oh-so-satisfying to the palate.
You’ll adore this bread on picnic outings, as part of a cozy brunch, or simply for that Monday morning lift. It’s eternally versatile—wonderfully paired with hearty stews, or perhaps transformed into elegant sandwiches brimming with fresh ingredients. The look of delight on your family’s faces as they dig into a sliced loaf will be a reward in itself.
Preparation Phase & Tools to Use
Before you embark on this baking adventure, let’s gather the essential tools that will be your trusty sidekicks in the kitchen:
- Large Mixing Bowl: This generous-sized bowl is crucial for mixing your ingredients without creating a mess.
- Wooden Spoon: A sturdy wooden spoon allows you to stir your dough thoroughly without damaging it.
- Plastic Wrap: Use this to cover the bowl tightly, ensuring your dough has a warm and cozy environment to rise.
- Dutch Oven: This heavy pot retains heat beautifully, creating a steamy atmosphere inside; the secret to that crackly crust!
- Cooling Rack: Once out of the oven, a cooling rack allows air to circulate around the loaf, preventing a soggy bottom.
Preparation Tips
- Keep your ingredients measured and ready to go.
- Ensure your water is warm but not hot—aim for around 110°F to activate the yeast without killing it.
- Allocate time for the long rise—this is where the magic happens!
Ingredients for Homemade No-Knead Sandwich Bread
Gather the simplicity of these four ingredients:
- 4 cups all-purpose flour: A fundamental building block for this recipe. For a healthier twist, consider substituting half of it with whole wheat flour.
- 1 ½ teaspoons salt: This enhances the flavor and controls yeast activity.
- 1 teaspoon instant yeast: You won’t need to activate it—just sprinkle it right in. Instant yeast helps give your bread that delectable rise.
- 2 cups warm water: Vital for mixing and activating the yeast, it transforms the dry blend into a wet, shaggy dough.
How to Make Homemade No-Knead Sandwich Bread
-
In a large mixing bowl, combine the flour, salt, and yeast. Stir with a wooden spoon until everything is well mixed.
-
Gradually pour in the warm water, mixing until no dry flour remains. Your dough will appear sticky and shaggy—don’t overmix. This texture is key!
-
Cover the bowl tightly with plastic wrap and set it aside at room temperature for 12 to 18 hours. This extended period allows the flavors to develop beautifully.
-
Preheat your oven to 450°F (230°C) and place your Dutch oven inside to heat up.
-
Flip the dough onto a floured surface and gently shape it into a ball. Let it rest uncovered for about 30 minutes.
-
Carefully remove the hot Dutch oven from the oven, place your dough inside, cover with the lid, and bake for 30 minutes.
-
Remove the lid and continue baking for an additional 15 to 20 minutes. Watch it turn a gorgeous golden brown!
-
Allow the loaf to cool on a wire rack before slicing into glorious wedges of homemade happiness.
Chef’s Notes & Helpful Tips
- You can prepare the dough the night before and bake it fresh in the morning—perfect for breakfast time!
- For extra flavor, try adding herbs like rosemary or thyme into the mixture. Customizations are a delightful way to express your culinary creativity!
- If you don’t have a Dutch oven, a heavy baking dish with a lid can suffice. Just ensure it can withstand high temperatures.
Common Mistakes to Avoid
- Using cold water: This can inhibit yeast activity. Always ensure it’s warm enough.
- Not allowing enough rising time: Rushing this step will yield denser bread. Patience is key!
- Overbaking: Watch the color closely; while golden is good, burning is not! Take it out at just the right time.
What to Serve With Homemade No-Knead Sandwich Bread
Elevate your experience of this scrumptious bread with these delectable pairings:
- Avocado Toast: A sprinkle of salt and a drizzle of olive oil turns this classic into a chic snack.
- Grilled Cheese: The bread’s texture accommodates melty cheeses perfectly.
- Soups and Stews: Perfect for dipping—think creamy tomato or chunky chicken noodle.
- Egg Salad: A delightful filling that turns brunch into a feast.
- Sandwiches: From deli meats to roasted veggies, this bread holds flavors beautifully.
- Bruschetta: Top slices with tomatoes and basil for a quintessential appetizer.
- Homemade Jam: Spread on a warm slice, the sweetness balances the bread’s rustic charm.
Storage & Reheating Instructions
This bread stays fresh when stored properly. Wrap it in a clean kitchen towel or store it in a bread bag at room temperature for about three days. For longer preservation, slice the loaf and freeze it in an airtight container for up to three months. When it’s time to enjoy, simply let it thaw at room temperature or pop it into a toaster for a warm resurgence.
Estimated Nutrition Information
Approximate values per slice (assuming 12 slices):
- Calories: 120
- Carbohydrates: 24g
- Protein: 3g
- Fat: 1g
- Fiber: 1g
Please note that nutritional values may vary based on specific ingredients and portion sizes.
FAQs
Can I use whole wheat flour instead of all-purpose flour?
Yes, you can use whole wheat flour, but it may yield denser bread. A mix of both flours often offers the best results.
What if my dough is too wet?
It’s essential to maintain a wet, shaggy consistency for the best rise; however, you can sprinkle a bit more flour as you shape the dough if it’s overly sticky.
Can I add herbs and spices to the dough?
Absolutely! Adding herbs like dill, rosemary, or spices like garlic powder can enhance the flavors of the bread.
What if I don’t have a Dutch oven?
Using a heavy baking dish with a lid or a covered roasting pan can mimic the steamy environment needed for your bread.
How do I know when my bread is done baking?
Look for a beautiful golden crust and tap the bottom; it should sound hollow.
Warm, inviting, and filled with the essence of home, this homemade no-knead sandwich bread makes for a delightful culinary journey. Imagine the excitement of slicing into a masterpiece, the crumb soft and airy, alongside the satisfaction of having crafted it with your own hands. Don’t just read about it—bake it! Experience the joy, the love, and the enchanting aroma filling your kitchen. This bread invites not only a taste but a story, a memory, and a promise of comfort. Give it a try—you will not be disappointed!
Print
Homemade No-Knead Sandwich Bread
- Prep Time: 15 minutes
- Cook Time: 50 minutes
- Total Time: 65 minutes
- Yield: 12 slices 1x
- Category: Bread
- Method: Baking
- Cuisine: American
- Diet: Vegetarian
Description
A simple yet delicious no-knead sandwich bread that offers a perfect balance of crusty exterior and soft, pillowy interior.
Ingredients
- 4 cups all-purpose flour
- 1½ teaspoons salt
- 1 teaspoon instant yeast
- 2 cups warm water
Instructions
- Combine the flour, salt, and yeast in a large mixing bowl. Stir with a wooden spoon until well mixed.
- Gradually pour in the warm water, mixing until no dry flour remains.
- Cover the bowl tightly with plastic wrap and set it aside at room temperature for 12 to 18 hours.
- Preheat your oven to 450°F (230°C) and place your Dutch oven inside to heat up.
- Flip the dough onto a floured surface and gently shape it into a ball. Let it rest uncovered for about 30 minutes.
- Carefully remove the hot Dutch oven from the oven, place your dough inside, cover with the lid, and bake for 30 minutes.
- Remove the lid and continue baking for an additional 15 to 20 minutes until golden brown.
- Allow the loaf to cool on a wire rack before slicing.
Notes
You can prepare the dough the night before for fresh-baked bread in the morning. Experiment by adding herbs for extra flavor.
Nutrition
- Serving Size: 1 slice
- Calories: 120
- Sugar: 0g
- Sodium: 320mg
- Fat: 1g
- Saturated Fat: 0g
- Unsaturated Fat: 1g
- Trans Fat: 0g
- Carbohydrates: 24g
- Fiber: 1g
- Protein: 3g
- Cholesterol: 0mg