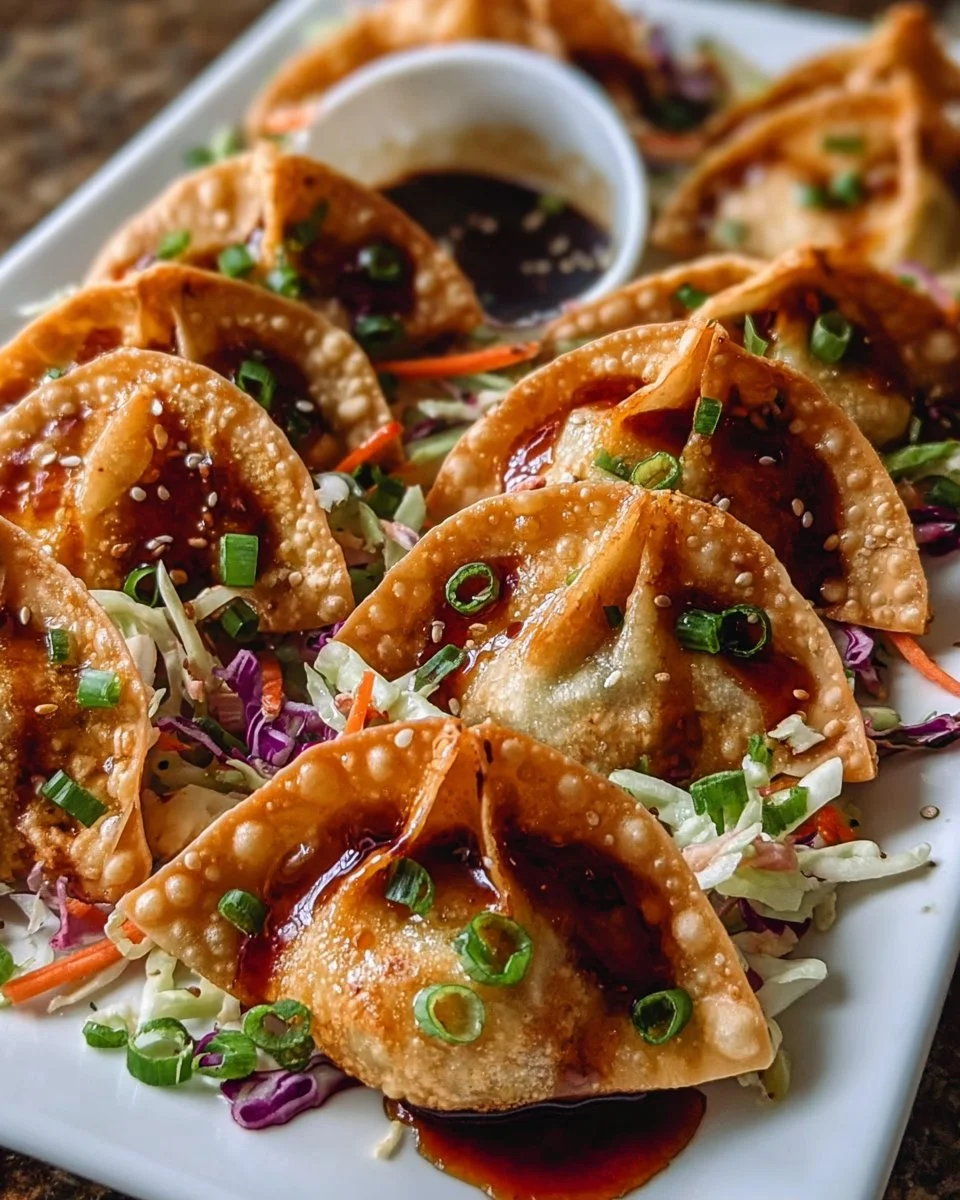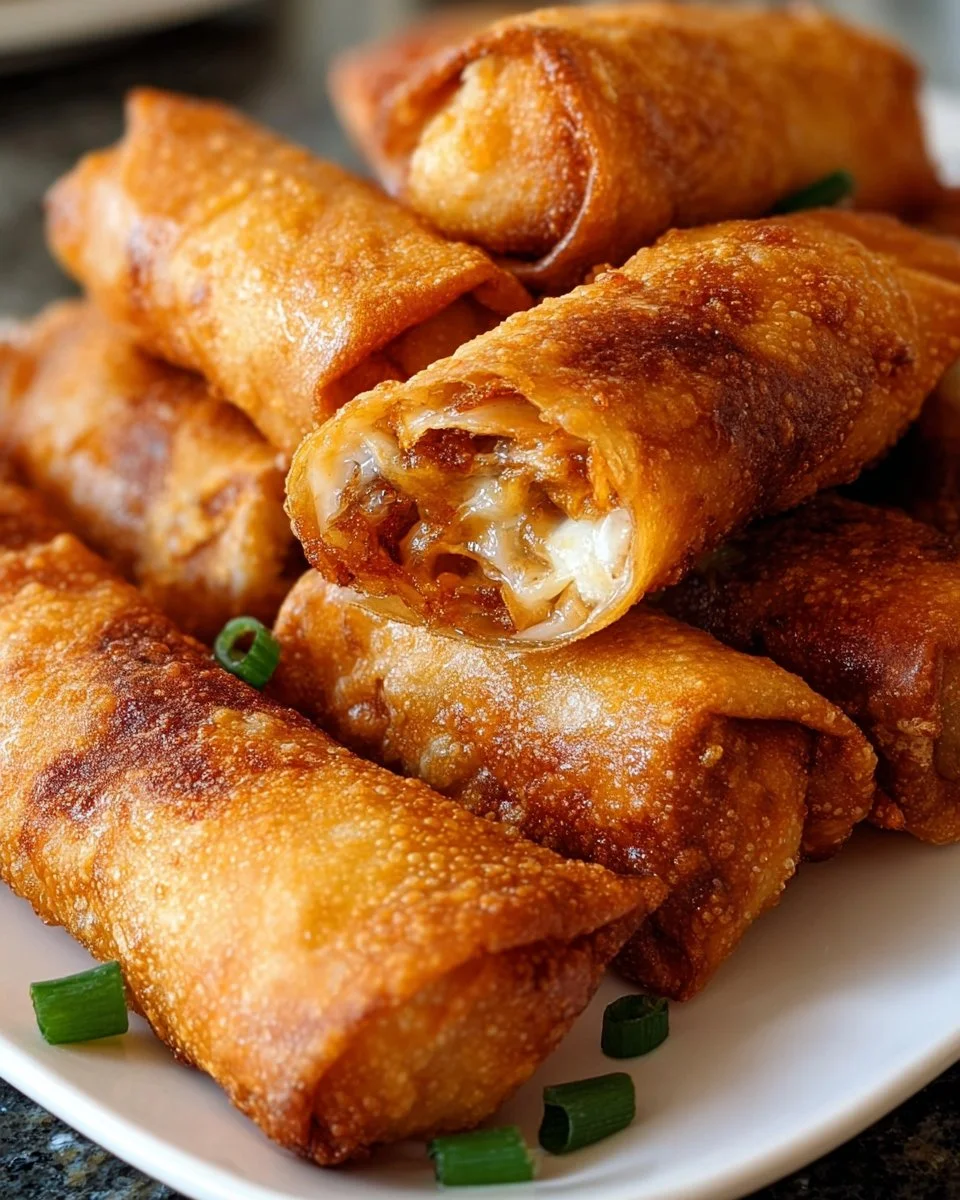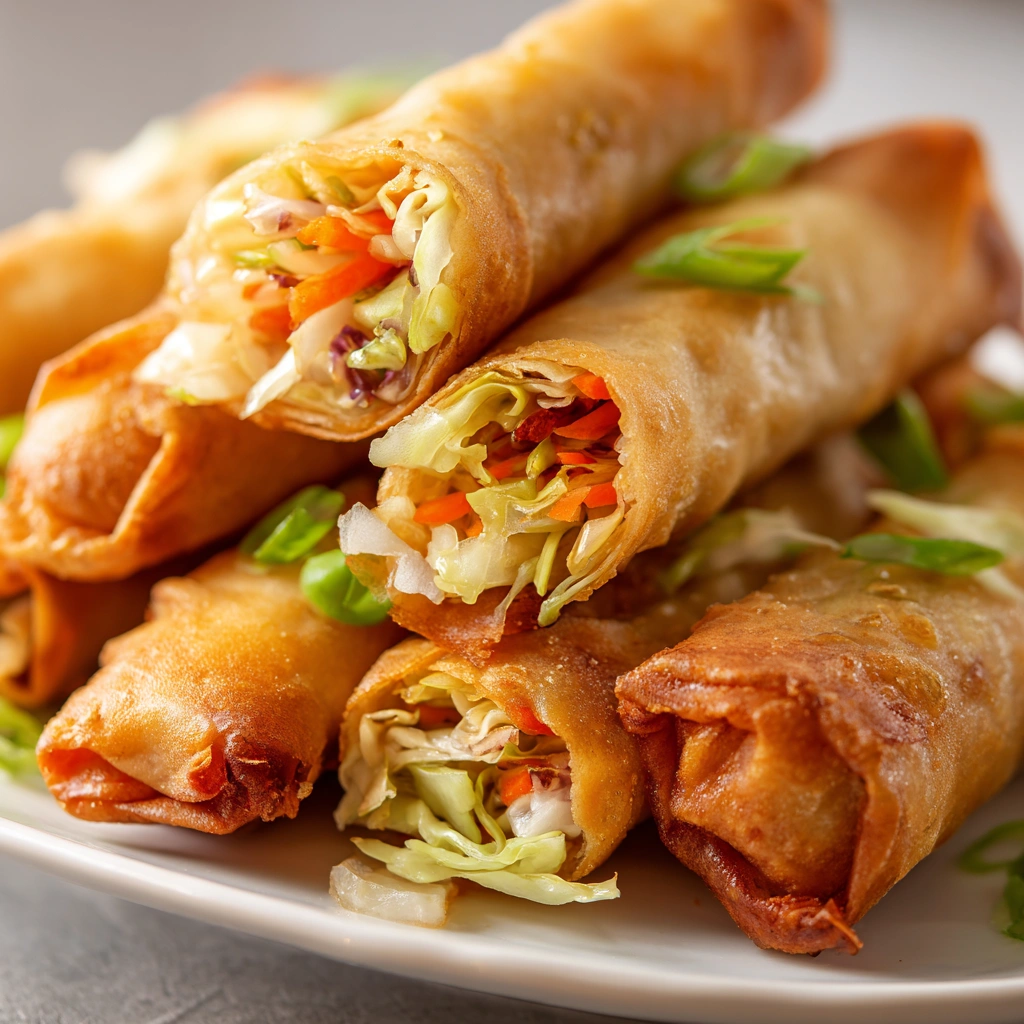
Introduction to Spring Rolls
Ah, spring rolls! These delightful little bites are like a hug for your taste buds. I remember the first time I made them; my kitchen was filled with laughter and the aroma of fresh veggies. Perfect for busy days, spring rolls are quick to whip up and can impress even the pickiest eaters. Whether you’re hosting a gathering or just need a tasty snack, these crispy wonders are your go-to. Plus, they’re versatile! You can fill them with whatever you have on hand. Let’s dive into the world of spring rolls and discover how to make them shine!
Why You’ll Love This Spring Rolls
Spring rolls are a lifesaver for busy moms and professionals like us. They come together in no time, making them perfect for those hectic weeknights. The crispy texture combined with fresh flavors is simply irresistible. Plus, you can customize the filling to suit your family’s tastes. Whether you’re craving something light or hearty, these spring rolls are sure to please everyone at the table!
Ingredients for Spring Rolls
Gathering the right ingredients is the first step to creating these crispy delights. Here’s what you’ll need:
- Shredded cabbage: This adds a crunchy texture and a mild flavor that balances the other ingredients.
- Shredded carrots: Sweet and vibrant, they bring color and a hint of sweetness to your rolls.
- Bean sprouts: These little gems add a refreshing crunch and are packed with nutrients.
- Chopped green onions: They provide a subtle onion flavor that enhances the overall taste.
- Shrimp or chicken (optional): For those who want a protein boost, these options make the rolls heartier.
- Spring roll wrappers: The star of the show! These thin sheets are what hold all the deliciousness together.
- Oil for frying: Choose a neutral oil with a high smoke point, like vegetable or canola oil, for that perfect crisp.
- Salt and pepper: Simple seasonings that elevate the flavors of your filling.
Feel free to get creative! You can swap out the veggies based on what you have in your fridge. For instance, bell peppers or zucchini work beautifully too. If you’re looking for a vegetarian option, just skip the meat altogether. The exact quantities for each ingredient are listed at the bottom of the article for your convenience.
How to Make Spring Rolls
Now that we have our ingredients ready, let’s get to the fun part—making those crispy spring rolls! Follow these simple steps, and you’ll be on your way to a delicious appetizer that will wow your family and friends.
Step 1: Prepare the Filling
Start by grabbing a large mixing bowl. Toss in the shredded cabbage, carrots, bean sprouts, and green onions. If you’re using shrimp or chicken, add that too. Mix everything together gently. You want the veggies to be evenly distributed, creating a colorful filling. The vibrant colors will make your spring rolls even more appealing!
Step 2: Season the Mixture
Now, let’s talk seasoning! Sprinkle a pinch of salt and a dash of pepper over your filling. This step is crucial because it enhances the flavors of the vegetables and meat. Don’t be shy—taste a little bit of the mixture to see if it needs more seasoning. Remember, you can always add more, but you can’t take it out!
Step 3: Assemble the Spring Rolls
Grab a spring roll wrapper and lay it flat on a clean surface. Spoon a generous amount of your filling into the center. Fold the sides of the wrapper over the filling, then roll it up tightly from the bottom. Make sure it’s snug but not too tight, or the wrapper might tear. Repeat this process until all your filling is used up. It’s like wrapping a little present for your taste buds!
Step 4: Heat the Oil
Next, it’s time to heat the oil. Pour enough oil into a frying pan to cover the bottom, about half an inch deep. Heat it over medium heat. To check if the oil is hot enough, drop a small piece of wrapper into the oil. If it sizzles, you’re ready to fry! This step is key for achieving that perfect crispy texture.
Step 5: Fry the Spring Rolls
Carefully place a few spring rolls into the hot oil, making sure not to overcrowd the pan. Fry them for about 3-4 minutes on each side, or until they turn golden brown. Use tongs to flip them gently. Keep an eye on them; you want that beautiful crispy exterior without burning. Once they’re done, remove them from the oil and let them drain on paper towels.
Step 6: Drain and Serve
After frying, it’s important to let the spring rolls drain properly. Place them on a plate lined with paper towels to soak up any excess oil. Serve them hot with your favorite dipping sauce, like sweet chili or soy sauce. Trust me, the crunch and flavor will have everyone coming back for more!
Tips for Success
- Make sure your oil is hot enough before frying to achieve that perfect crispiness.
- Don’t overfill the spring rolls; a little filling goes a long way!
- Keep the wrappers covered with a damp cloth while assembling to prevent them from drying out.
- Experiment with different fillings to find your family’s favorite combination.
- Serve immediately for the best texture; they’re at their crispiest right out of the oil!
Equipment Needed
- Frying pan: A deep skillet works well, but a wok is great for even frying.
- Tongs: Essential for flipping the spring rolls safely; a slotted spoon can work too.
- Mixing bowl: Any large bowl will do for combining your filling ingredients.
- Paper towels: Perfect for draining excess oil after frying.
Variations of Spring Rolls
- Vegetarian Delight: Skip the meat and load up on extra veggies like bell peppers, mushrooms, or spinach for a fresh twist.
- Spicy Kick: Add some sliced jalapeños or a dash of sriracha to the filling for a spicy flavor explosion.
- Sweet and Savory: Incorporate diced mango or pineapple for a sweet contrast to the savory filling.
- Asian Fusion: Try adding cooked noodles or tofu for a heartier roll that’s packed with flavor.
- Herb Infusion: Mix in fresh herbs like cilantro or basil to elevate the taste and add a burst of freshness.
Serving Suggestions for Spring Rolls
- Dipping sauces: Serve with sweet chili sauce, soy sauce, or a tangy peanut sauce for extra flavor.
- Fresh herbs: Garnish with cilantro or mint for a pop of color and freshness.
- Side dishes: Pair with a light salad or steamed rice for a complete meal.
- Presentation: Arrange on a platter with colorful veggies for an eye-catching display.
FAQs about Spring Rolls
Can I make spring rolls ahead of time?
Absolutely! You can prepare the filling and assemble the spring rolls a few hours in advance. Just keep them covered with a damp cloth to prevent drying out. When you’re ready to serve, fry them up for that fresh, crispy texture!
What can I use instead of spring roll wrappers?
If you can’t find spring roll wrappers, rice paper is a great alternative. Just soak them in warm water until pliable, then fill and roll as you would with traditional wrappers. They’ll have a slightly different texture but are equally delicious!
How do I store leftover spring rolls?
Store any leftover spring rolls in an airtight container in the fridge for up to two days. To reheat, pop them in the oven for a few minutes to regain that crispy texture. Microwaving can make them soggy, so avoid that if you can!
Can I freeze spring rolls?
Yes, you can freeze uncooked spring rolls! Just place them in a single layer on a baking sheet until frozen, then transfer to a freezer bag. When you’re ready to enjoy, fry them straight from the freezer—just add a couple of extra minutes to the cooking time.
What dipping sauces pair well with spring rolls?
Spring rolls are versatile when it comes to dipping sauces! Sweet chili sauce, soy sauce, or a tangy peanut sauce are all fantastic choices. You can even whip up a quick hoisin sauce for a delightful twist!
Final Thoughts
Making spring rolls is more than just cooking; it’s about creating memories in the kitchen. The joy of wrapping those crispy bites, filled with fresh flavors, brings a sense of accomplishment. Each roll is a little package of happiness, perfect for sharing with loved ones. Whether it’s a family dinner or a casual gathering, these spring rolls are sure to impress. Plus, the versatility allows you to experiment and make them your own. So, roll up your sleeves, gather your ingredients, and let the fun begin. You’ll be savoring every crispy bite in no time!
Print
Spring Rolls: Discover the Secret to Perfectly Crispy Bites!
- Prep Time: 20 minutes
- Cook Time: 15 minutes
- Total Time: 35 minutes
- Yield: 12 spring rolls 1x
- Category: Appetizer
- Method: Frying
- Cuisine: Asian
- Diet: Vegetarian
Description
Spring Rolls are a delicious and crispy appetizer filled with fresh vegetables and sometimes meat, perfect for any occasion.
Ingredients
- 1 cup of shredded cabbage
- 1 cup of shredded carrots
- 1/2 cup of bean sprouts
- 1/4 cup of chopped green onions
- 1/2 pound of shrimp or chicken (optional)
- 1 package of spring roll wrappers
- Oil for frying
- Salt and pepper to taste
Instructions
- Prepare the filling by mixing cabbage, carrots, bean sprouts, green onions, and shrimp or chicken in a bowl.
- Season the mixture with salt and pepper.
- Take a spring roll wrapper and place a spoonful of the filling in the center.
- Fold the sides of the wrapper over the filling and roll it tightly.
- Heat oil in a frying pan over medium heat.
- Fry the spring rolls until golden brown and crispy, about 3-4 minutes on each side.
- Remove from oil and drain on paper towels.
- Serve hot with dipping sauce.
Notes
- For a vegetarian option, omit the shrimp or chicken.
- Make sure the oil is hot enough before frying to ensure crispiness.
- Serve with sweet chili sauce or soy sauce for dipping.
Nutrition
- Serving Size: 1 spring roll
- Calories: 150
- Sugar: 2g
- Sodium: 200mg
- Fat: 8g
- Saturated Fat: 1g
- Unsaturated Fat: 6g
- Trans Fat: 0g
- Carbohydrates: 15g
- Fiber: 1g
- Protein: 5g
- Cholesterol: 20mg